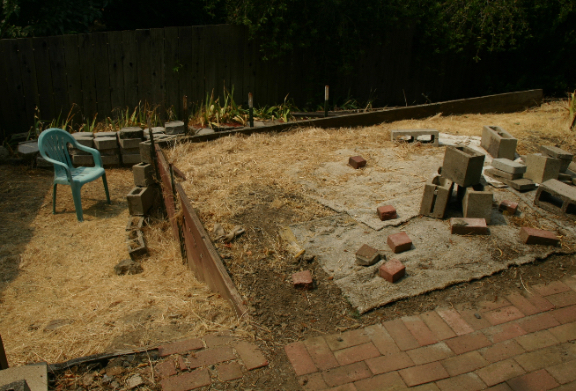
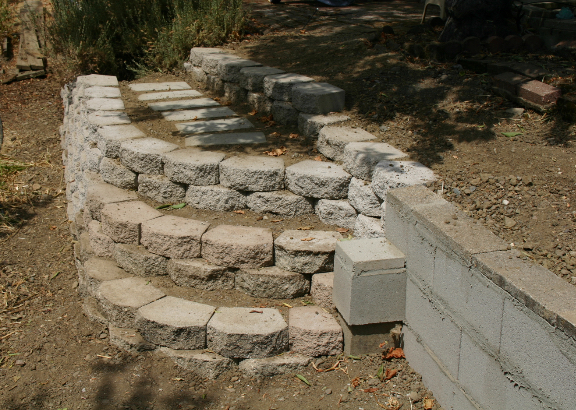
This next phase would be the very first track laid on the ground, making it a true "garden railroad". However, I first needed to do some serious construction work. Our lot is on a hillside, with the upper story of the house at ground level at the front door, and a daylight lower level, which includes my shop. The back yard had been terraced to provide more level area for flower beds. In the southeast corner, that included a wooden retaining wall, with steps along the east end to the lowest level of the yard. This was all failing and needed replacement before any track work. This was the condition when I started the rebuilding. The wooden stairs had previously been removed at the east end.
This southeast corner shows the failing retaining structure
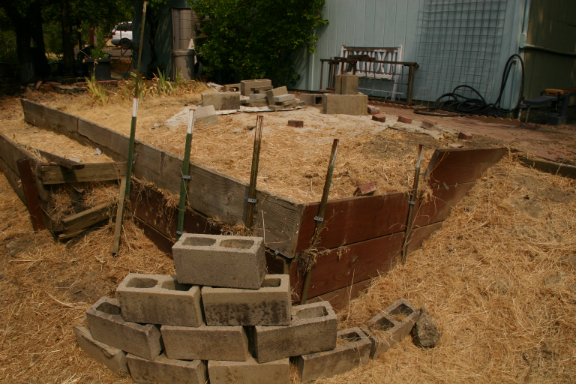
I decided to use concrete block to replace the walls, and wall blocks to build steps on the east end, and another set of steps up to the patio in the middle of the garden. I have never done this kind of work before, and it progressed very slowly, starting late summer 2022, taking a break for the winter rains, and finishing the next spring. The new east end stairs have a railing, and required reworking some of the brick path along the south side of my shop.
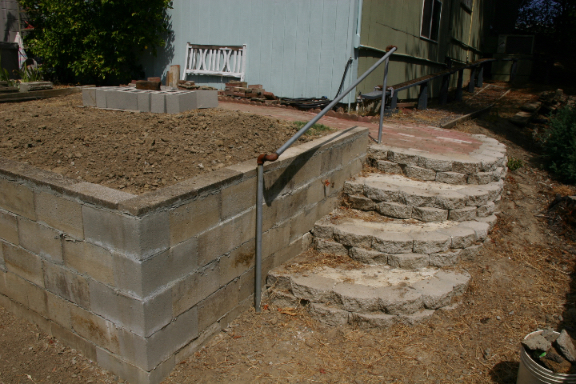
This the finished southeast corner.

Here are the new steps from the lowest level up to the patio.
The rail I use comes in 5' lengths, giving my large pieces of "snap" track. I had already fabricated the track and switches I would been for this phase, and began laying them on the ground to precisely define locations.
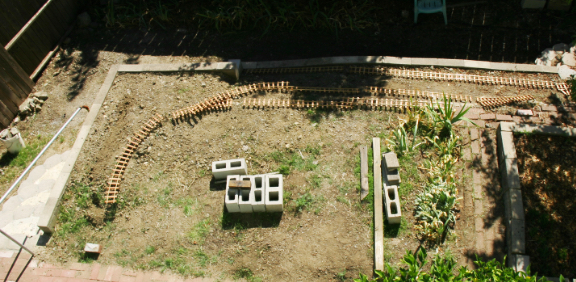
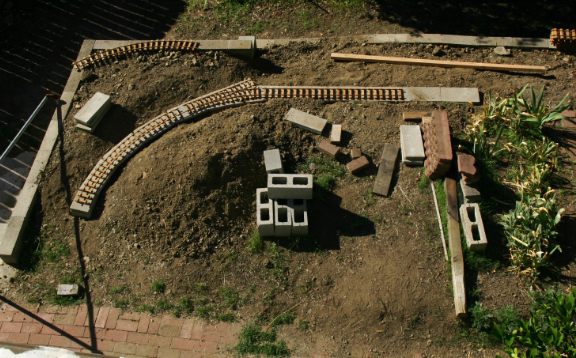
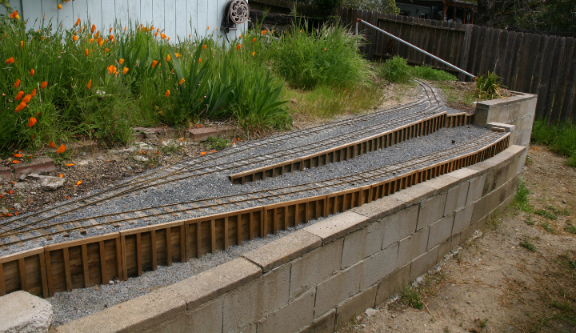
In my previous garden railroad, I had used code 250 aluminum rail on redwood ties, nailed to redwood 1"x2"s, as a foundation for my track. That foundation method eventually rotted, was relatively fragile to foot traffic, and allowed weeds to grow through the track. This time around I am using code 332 brass rail, which is much more robust. I also wanted to eliminate the weed issue, and have a foundation I could walk on. I decided to use concrete block cap pavers, 1.5"x7.5"x16". Where I needed more elevation, I set regular concrete blocks into the ground. Otherwise, I set bricks flat into the ground where each paver joined the next, eliminating weed growth. I then used Gorilla construction adhesive to glue down the pavers. At curves, I mitered the pavers, and at switches I installed pavers in parallel to make up the foundation width needed. Here you see the beginning of the process. The track is just placed for the photo. The track end in the lower left-hand corner will extend to a short trestle section leading to bridge 1 across the path.
Once the pavers were installed, I glued the track to the pavers. Ballast is crusher fines mixed about 3:1 with mortar, brushed onto the track dry, and then watered down. This leaves a crust, which is relatively stable, yet can be refreshed as needed. This is the southeast siding.
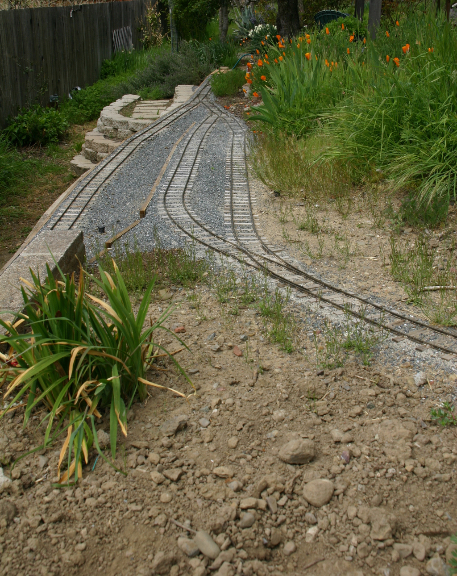
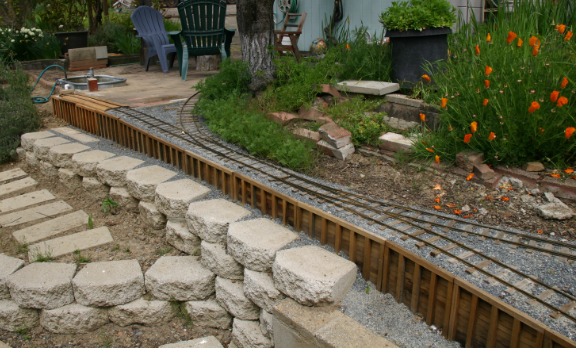
The elevation changes left the edges of the foundation blocks visible. I made panels of redwood boards to simulate a retaining wall structure, and glued them to the exposed sides of the blocks, then finished the ballast work. Here is the finished run around siding, as well as a spur down to the edge of the retaining wall that will allow dump cars (still to be fabricated) to empty into a wheel barrow.
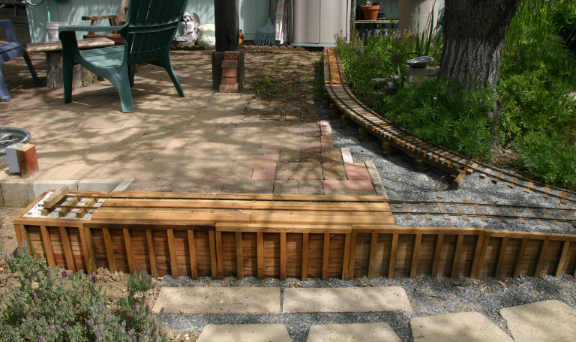
This is the west end of phase three.
There is a spur to the service the patio, and a level crossing at the steps up from the lower level. This required some additional brick work, as the patio was slowly falling down hill. The end of track for phase three is at the lower left corner.
Here is the long view of most of the phase three track work.
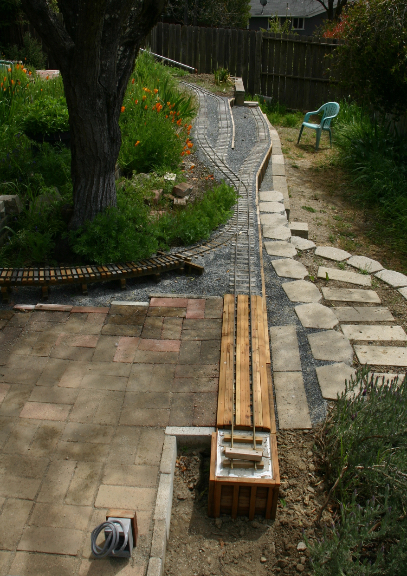
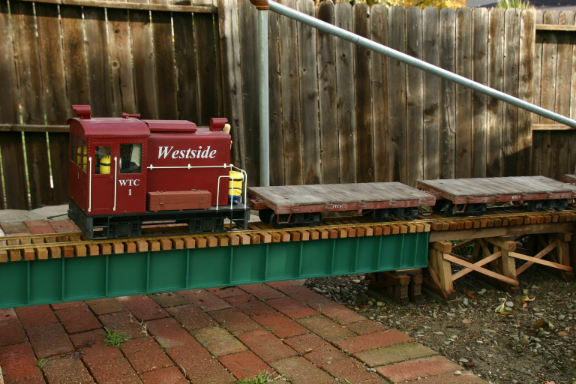
The last part of phase three was connecting to the end of the elevated section. This required a short span of trestle, and the first of several lift out bridges crossing the walkway. I'll describe trestle construction more in phase four. The bridge is a typical steel girder bridge. The spine is a redwood 4"x4", with plywood sides glued on. The sides are 3/8" birch, with 1/8" stiffener plates. All the plywood edges have edge trim glued on to seal the plies. The entire bridge is then primed and painted. This bridge just lifts out when needed.